Hello dear Amigurumi Followers
Today we share one free amigurumi crochet pattern again for you. As you know we share new amigurumi free patterns every day. The main crochets are amigurumi gazelles, amigurumi bears, amigurumi pola, amigurumi pandas, amigurumi penguins, amigurumi giraffes, amigurumi llama, amigurumi pigs, amigurumi bunny, amigurumi clowns, amigurumi lambs, amigurumi bees, amigurumi unicorns, amigurumi dolls, amigurumi foxes, amigurumi penguins, amigurumi dinosaurs, amigurumi elephants, amigurumi hippos, amigurumi monkeys, amigurumi cats, amigurumi dogs and more …
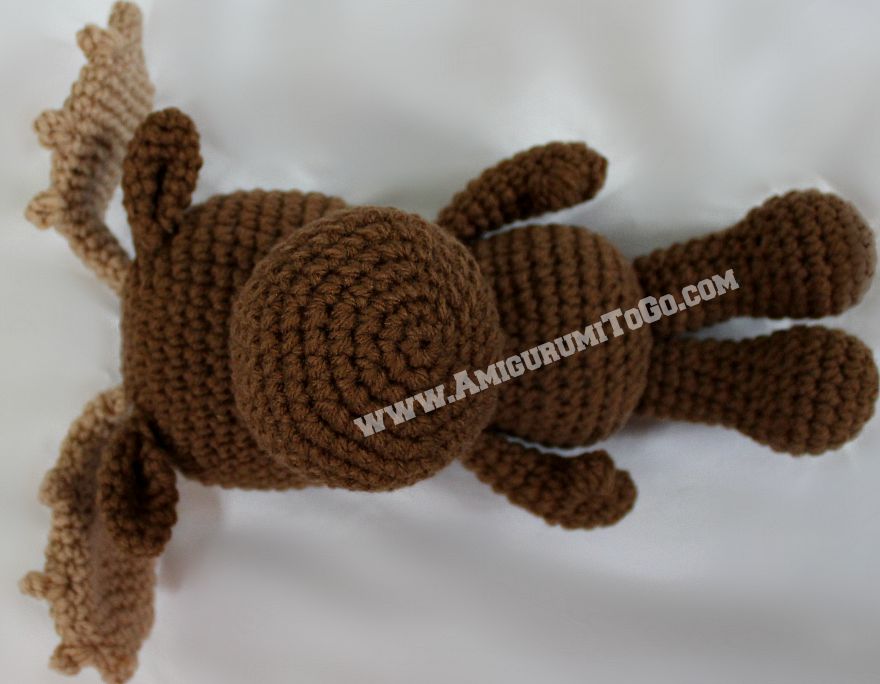
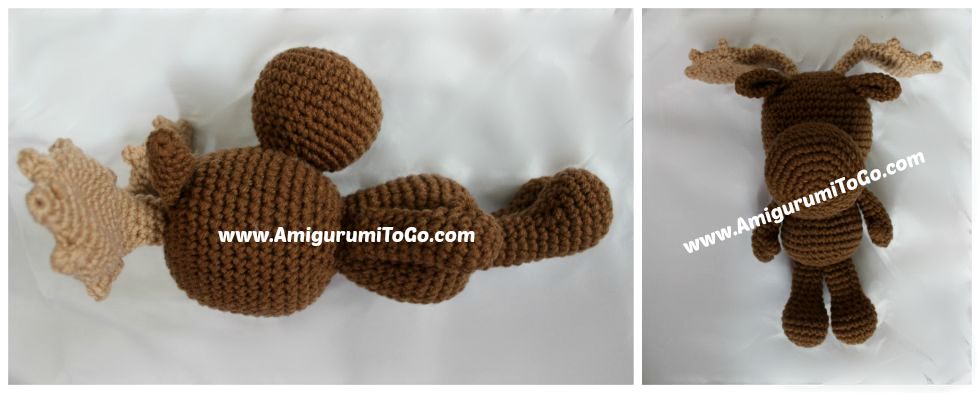
Todays daily new amigurumi free crochet pattern is Amigurumi Little Bigfoot Moose.
I want to give you some informations about this pattern ;
Supplies:
Red Heart Comfort yarn.
Brown moose ~ Mocha 3191 with antlers in Tan 3167
Beige Moose ~ Tan 3167 with antlers in Mocha 3191
4.0 mm hook – use a smaller hook if you see gaps in your stitches
blunt end yarn needle for sewing
scissors
100% polyester stuffing
you can use buttons, a french knot or paint eyes on. I used 10mm safety eyes that I glued in place.
4 pipe cleaners or some wire for the antlers
Abbreviations:
st = stitch
sc = single crochet
hdc = half double crochet * used for thumbs only
ch1 = chain one
sl st = slip stitch
2tog = crochet 2 stitches together
f/o = finish off
How to read the rows: Each row has a sequence as given below. Example: 1sc then 2sc in next st means repeat that sequence 1sc then 2sc in next st followed by 1sc then 2sc in next st over and over to the end of that particular row. The number inside the parentheses ( ~ ) is the number of stitches you should have at the end of that particular row.
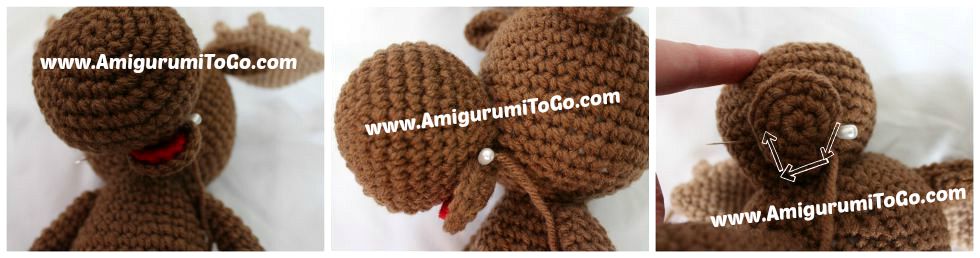
The head and body are worked in one piece. If you plan to install safety eyes they are placed in between the 10th and 11th row with 5 or 6 visible stitches between them.You can use anything from felt to paint to buttons for eyes. I glue in safety eyes with tacky glue or fabric glue after the doll is all done. If you need help with that, just leave a comment and I’ll link you up to a video.
Add in a marker at the end of row 2 and move that marker at the end of every row. There are assembly instructions at the bottom of this page, please view those for the best results.
Starting at the top of the head working down to bottom of body:
1) magic circle with 6sc (6)
2) 2sc in each st (12)
3) 1sc then 2sc in next st (18)
4) 1sc in next 2st then 2sc in next st (24)
5) 1sc in next 3st then 2sc in next st (30)
6) 1sc in next 4st then 2sc in next st (36)
7) 1sc in next 8st then 2sc in next st (40)
8-16) 1sc in each st for 9 rows
17) 1sc in next 8st then 2tog (36)
18) 1sc in next 4st then 2tog (30)
19) 1sc in next 3st then 2tog (24)
20) 1sc in next 2st then 2tog (18)
21) 1sc in next 4st then 2tog (15)
22) 1sc in each st for 1 row
23) 1sc in next 4st then 2sc in next st (18)
24) 1sc in next 2st then 2sc in next st (24)
stuff head add in more stuffing as needed over the next few rows
25-27) 1sc in each st for 3 rows
28) 1sc in next 3st then 2sc in next st (30)
29) 1sc in next 4st then 2sc in next st (36)
30-32) 1sc in each st for 3 rows
33) 1sc in next 4st then 2tog (30)
34) 1sc in next 3st then 2tog (24)
35) 1sc in next 2st then 2tog (18)
36) 1sc then 2tog (12)
stuff body, add in more stuffing as needed over the next 2 rows
37) 1sc then 2tog (8)
38) 2tog twice and f/o. Weave yarn tail in and out the remaining stitching and pull tight to close the gap. Knot off and hide yarn tail in body
Snout:
1) magic circle with 6sc (6)
2) 2sc in each st (12)
3) 1sc then 2sc in next st (18)
4) 1sc in next 2st then 2sc in next st (24)
5) 1sc in next 3st then 2sc in next st (30)
6) 1sc in next 4st then 2sc in next st (36)
7-10) 1sc in each st for 4 rows
11) 1sc in next 4st then 2tog (30)
12) 1sc in each st for 1 row
13) 1sc in next 3st then 2tog (24)
14) 1sc in each st for 1 row
15) 1sc in next 4st then 2tog (20)
sl st next st and f/o leaving a long tail for sewing. Add in the nostrils before or after sewing snout to head. If you do them before you will have to be mindful of centering. I prefer to put them in after. You can use French Knots or just add a whip stitch or 2, it’s up to you. Partially stuff then sew most of the snout in place then stuff it completely before sewing up the remaining gap.
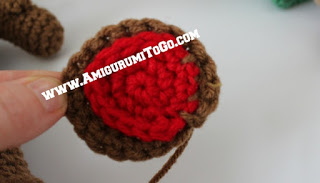
Mouth:
1) magic circle with 6st (6) crochet around the starting yarn tail
2) 2sc in each st (12)
3) 1sc then 2sc in next st (18)
sl st next st and f/o and leave a long tail for sewing.
Tongue:
1) magic circle with 6sc (6) crochet around the starting yarn tail
2) 2sc in each st (12)
f/o and weave in yarn tail
place wrong sides of the mouth and the tongue together, sew the end of the tongue to the mouth as pictured. Please note I borrowed this photo from my larger moose pattern. This is exactly the same and sewn together the same as the one you just made only larger.
You can sew the mouth to the snout before or after you sew the snout to the head. I prefer after but you do what will work best for you. Sew the back end of mouth over and around the 12th to the 14th row of the snout and leave the front of the mouth open. I sewed the mouth off to one side a bit and not right in the center, that way you can see the mouth more.
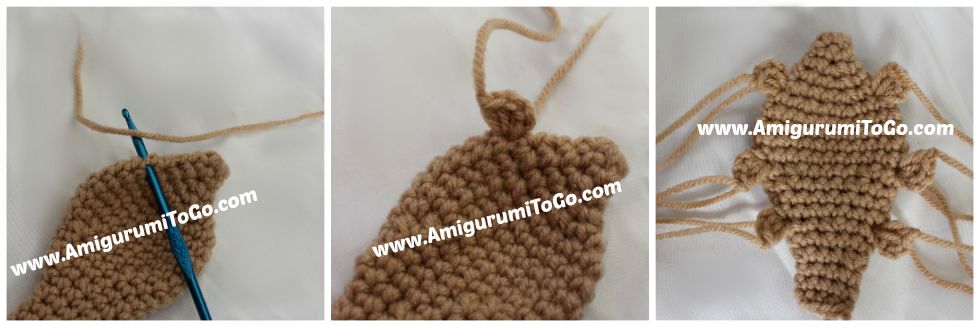
Ears:
1) magic circle with 6sc (6)
2) 1sc in next 2st then 2sc in the next st (8)
3) 1sc in the next 3st then 2sc in the next st (10)
4) 1sc in the next 4st then 2sc in the next st (12)
5) 1sc in the next 5st then 2sc in the next st (14)
6-7) 1sc in each st for 2 rows
ch1, bring the corners of row 7 together and sc through both sides at the same time, going across to seal up the open edge. f/o leaving a tail for sewing.
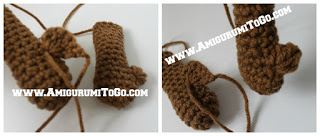
Arms:
1) magic circle with 6sc (6)
2) 2sc in each st (12)
3-4) 1sc in each st for 2 rows
5) 1sc in next 4st then 2tog (10)
6) 2tog then 1sc in next 8st (9)
7-12) 1sc in each st for 6 rows
sl st and f/o leaving a long tail for sewing. Lightly stuff hand, do not stuff arm.
Thumbs: optional
insert yarn in between the 4th and 5th row, ch 1 and add in 4hdc. f/o leaving a tail for shaping, knot off then hide the yarn tails inside the hand. Please note I borrowed the arm and thumb photo from my larger moose pattern. They are done the same way. If you notice a difference between this photo and the thumbs you just made it’s because these thumbs are made with hdc and the larger moose thumbs are made with dc.
Legs:
1) magic circle with 6sc (6)
2) 2sc in each st (12)
3) 1sc then 2sc in next st (18)
4) 1sc in next 8st then 2sc in next st (20)
5-6) 1sc in each st for 2 rows
7) 1sc in next 8st then 2tog (18)
8) (1sc then 2tog, repeat 4 times) 1sc in next 6st (14)
9) (1sc then 2tog, repeat 3 times) 1sc in next 5st (11)
10-15) 1sc in each st for 6 rows
sl st and f/o leaving a long tail for sewing. Stuff and shape foot and stuff leg
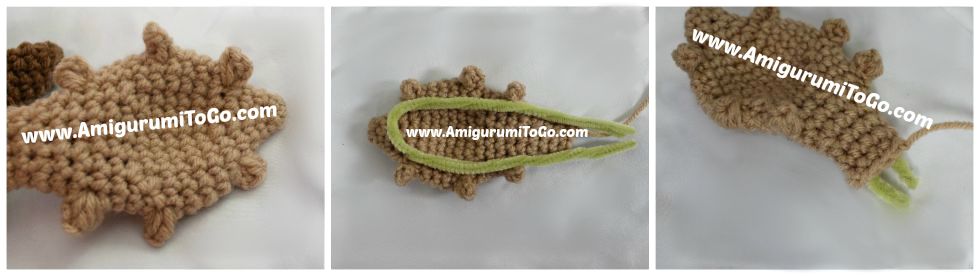
Tail:
1) ch5. Begin with a long enough starting tail you can sew into the body
2) sl st the 2nd ch from the hook, 1hdc in next 2 ch’s, sl st last ch. f/o with a long enough tail you can sew into the body.
Antlers:
1) magic circle with 6sc (6)
2) 1sc in each st for 1 row
3) 1sc then 2sc in next st (9)
4) 1sc in next 2st then 2sc in next st (12)
5) 1sc then 2sc in next st (18)
6) 1sc in next 2st then 2sc in next st (24)
7-10) 1sc in each st for 4 rows
11) 1sc in next 4st the 2tog (20)
12) 1sc in next 3st the 2tog (16)
13-14) 1sc in each st for 2 rows
15) 1sc in next 2st then 2tog (12)
16) 1sc in each st for 1 row
17) 1sc in next 2st then 2tog (9)
18-20) 1sc in each st for 3 rows
sl st next st and f/o leaving a long tail for sewing.
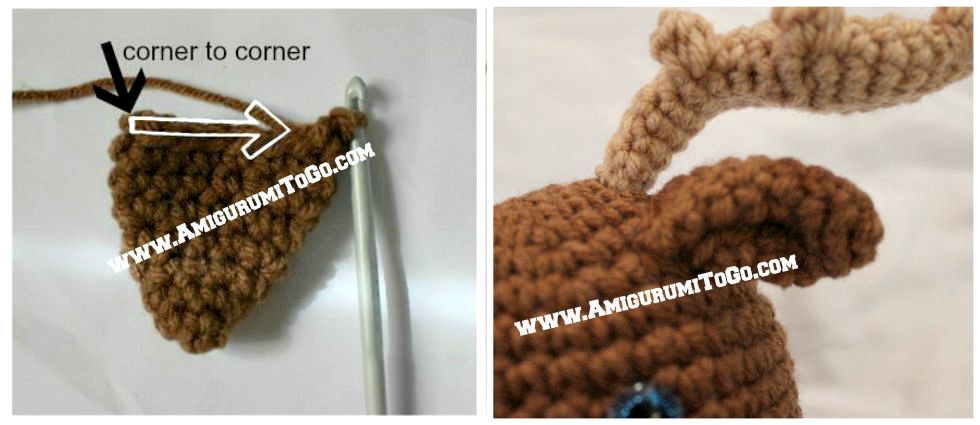
Antler Points:
For the points, flatten the antler then pull yarn through the side of the antler. ch1, put in 3hdc and f/o leaving a bit of a tail for shaping.
On each side of the antler:
The 1st point, pull the yarn through in between the 5th and 6th row
The 2nd point in between the 10th and 11th row
The 3rd point in between the 14th and 15th row
You can use some anchor stitches to hold the pipe cleaners in place. I didn’t feel the need to do that with this smaller moose. But if you want to add them please view the antler section of my larger moose for those instructions.
MOOSE ASSEMBLY: Take your time when sewing. Take breaks when you need them. Use pins to hold the parts in place and play around with the placements to be sure you are happy with how the parts look before sewing them in permanently.
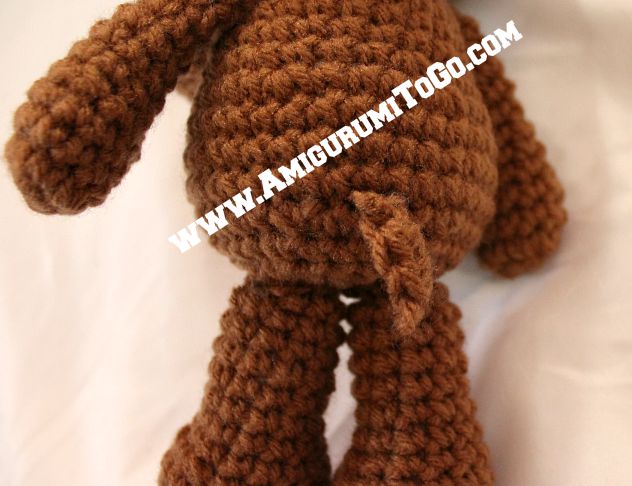
1) sew the arms on the 24th row or the 2nd row below the head.
2) sew on the legs. I have a video showing how I sew the Little Bigfoot Legs on right here
3) sew on the snout. Row 15 of the snout should be on or touching row 13 and the bottom on or touching row 19 of the head . You can also sew the mouth piece on now if you haven’t already. See instructions for sewing in the mouth and tongue section above
4) sew the tail in between the 32nd and 33rd row.
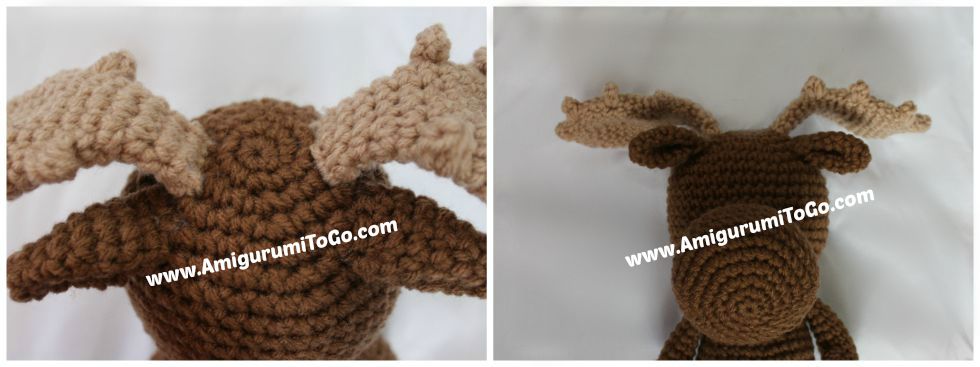
5) sew antlers on the 3rd and 4th row. The pipe cleaners need to be wiggled into place. This part takes a bit of time but they will go in. Sew all around the edge of the antler and pull your stitches tight.
6) sew the ears on the 5th and 6th row.


More Amigurumi Little Bigfoot Moose Ideas: