Hello dear Amigurumi Followers
Today we share one free amigurumi crochet pattern again for you. As you know we share new amigurumi free patterns every day. The main crochets are amigurumi gazelles, amigurumi bears, amigurumi pola, amigurumi pandas, amigurumi penguins, amigurumi giraffes, amigurumi llama, amigurumi pigs, amigurumi bunny, amigurumi clowns, amigurumi lambs, amigurumi bees, amigurumi unicorns, amigurumi dolls, amigurumi foxes, amigurumi penguins, amigurumi dinosaurs, amigurumi elephants, amigurumi hippos, amigurumi monkeys, amigurumi cats, amigurumi dogs and more …
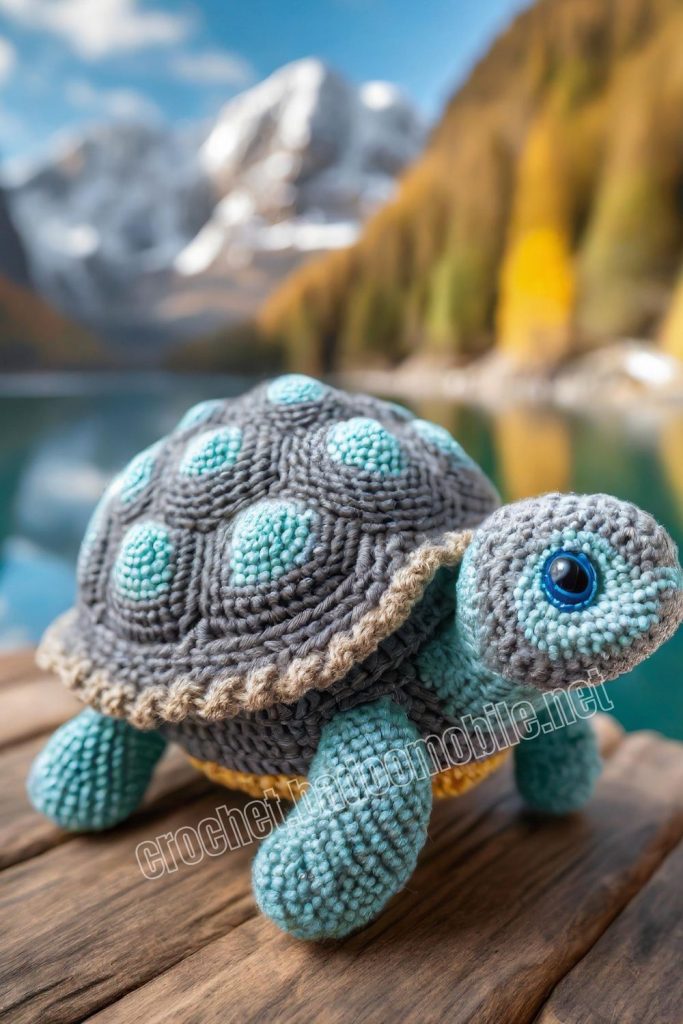
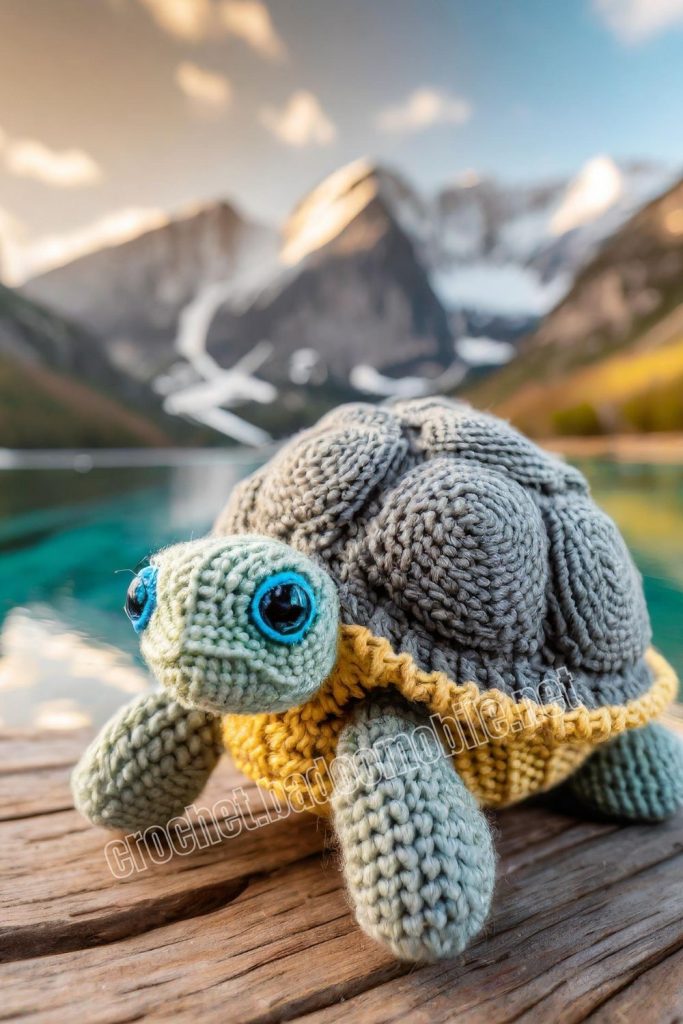
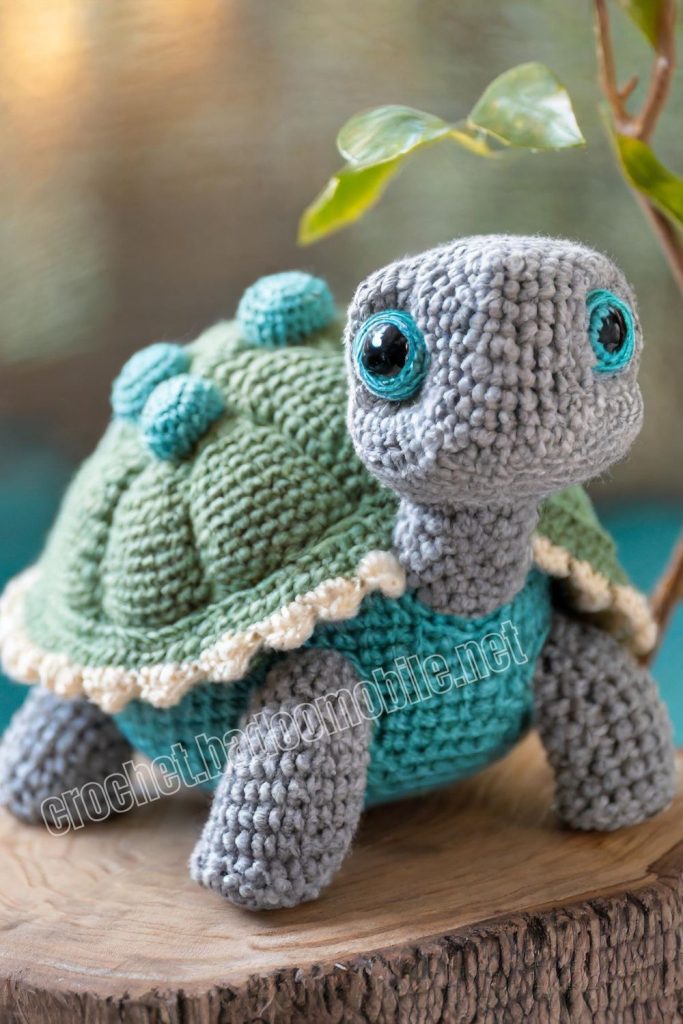
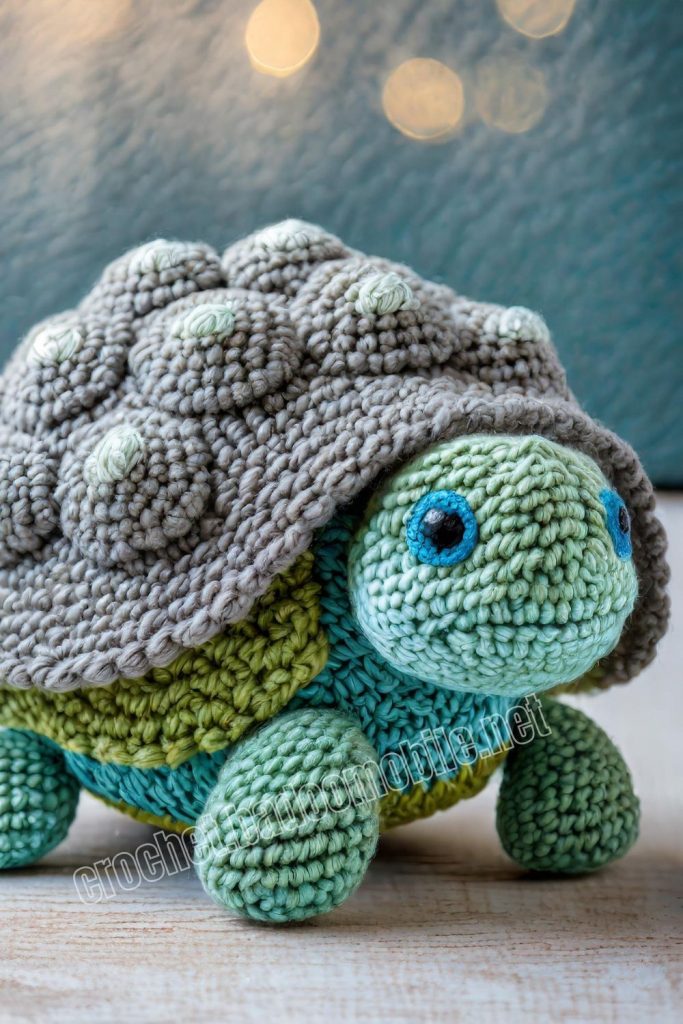
Todays daily new amigurumi free crochet pattern is Amigurumi Cute Crochet Tortoise.
I want to give you some informations about this pattern ;

Materials
A crochet, I use a crochet size B-1 (2.25 mm), you can use another size depending on your yarn. Use a
smaller hook if you crochet loosely.
• Tapestry needle
• Pair of scissors
• A pair of 4.5 mm safety eyes
• Stitch markers
• Polyester fiberfill stuffing
• Stick to help you stuff small pieces
• Pins
• A small piece of light pink felt for the cheeks
• Textile adhesive to glue felt
• Yarn, I give you in brackets the references I used:
Brown (Scheepjes Catona 503, Hazelnut)
Caramel (Scheepjes Catona 179, Topaz)
Beige (Scheepjes Catona 404, English tea)
Green (Scheepjes Catona 392, Lime juice)
Red (Scheepjes Catona 115, Hot red)
Abbreviations
MR – Amigurumi Magic ring
sc : Single Crochet
inc : Increase
dec : Decrease
tr : Triple Crochet/ Treble Crochet
st: Stitch
dc : Double Crochet
hdc: Half Double Crochet
sl-st or Slst: Slip Stitch
ch : Chain
tch: Turnin chain crochet
FLO : Crochet into front loops only
BLO : Crochet into back loops only
Amigurumi Cute Crochet Tortoise Free Pattern:
SHELL
Use brown yarn:
r.1: 6sc in a magic ring (6)
r.2: 6inc (12)
r.3: [1sc, 1inc] x6 (18)
r.4: 1sc, 1inc, [2sc, 1inc] x5, 1sc (24)
r.5: [3sc, 1inc] x6 (30)
r.6: 2sc, 1inc, [4sc, 1inc] x5, 2sc (36)
r.7: [5sc, 1inc] x6 (42)
r.8: 3sc, 1inc, [6sc, 1inc] x5, 3sc (48)
r.9-16 (8r.): 48sc (48)
Break yarn and fasten off invisibly (→photo 01).

Break brown yarn and continue with caramel yarn:
r.17: Join drawing caramel yarn through the front loop of one stitch of round 16 (→photo 02), 1ch, 1sc in the same loop, work this round through flo, 47sc (48) (→photo 03)
Note: If you have a slightly larger hook, you can use it to crochet the edge of the shell. Personally, I used a 2.75 mm hook here, instead of 2.25 mm for the rest of the turtle. This is not essential.
r.18: 48 twisted sc (→technique below) (48) (→photo 04) You can replace the twisted single crochet stitches with crab stitches, if you prefer.1slst in the 1st stitch, fasten off and weave in the yarn ends.

LEGS X4
Use green yarn:
r.1: 6sc in a magic ring (6)
r.2: 2inc, 3inc/hdc, 1inc (12)
r.3: Work this round through blo, 12sc (12)
r.4: 4sc, 3dec, 2sc (9)
r.5: 2sc, 1inc, 1sc, 1sc flo, 1inc flo, 1sc flo, 1sc, 1inc (12)
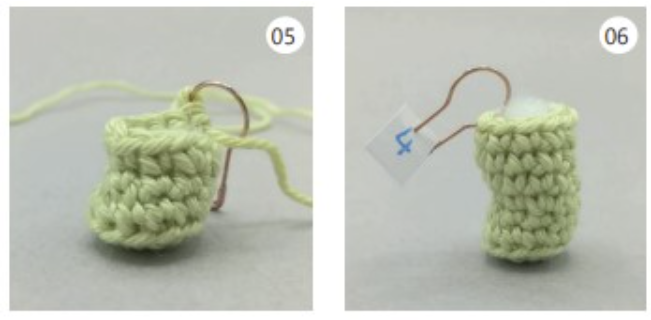
Stuff the foot as firmly as possible without stretching the stitches (→photo 05).
r.6: 1dec, 5sc, 1inc, 4sc (12)
r.7: 1dec, 4sc, 1inc, 5sc (12)
r.8: 1inc, 5sc, 1dec, 4sc (12)
Finish stuffing the leg firmly.
Notes: On each leg, add a small piece of paper with numbers so that you don’t lose the thread.
Leg #1: Place a marker in the 10th stitch, 1slst in the 1st stitch. Break yarn and fasten off invisibly.
Leg #2: Crochet an additional sc and place a marker in this stitch, 1slst in the next stitch. Break yarn and fasten off invisibly.
Leg #3: Place a marker in the 4th stitch, 1slst in the 1st stitch. Break yarn and fasten off invisibly.
Leg #4: Place a marker in the 7th stitch, 1slst in the 1st stitch. Break yarn and fasten off invisibly.
BELLY
Use beige yarn:
r.1: 6sc in a magic ring (6)
r.2: 6inc (12)
r.3: [1sc, 1inc] x6 (18)
r.4: 1sc, 1inc, [2sc, 1inc] x5, 1sc (24)
In the next round, you are going to connect the inside of the legs to the belly.
r.5: Take leg #1, insert your crochet in the marked stitch of the leg, from inside to outside and in the next stitch of the belly (→photo 07), work 1sc through these two layers. Continue crocheting 2sc through the next stitches of the leg and the next stitches of the belly. 3sc around the belly (→photo 08), 3sc crocheting at the same time in the leg #2 and in the belly (for this leg and the following ones, proceed as for the leg #1), 3sc around the belly, crocheting at the same time in the leg #3 and in the belly, 3sc around the belly, 3sc crocheting at the same time in the leg #4 and in the belly, 3sc around the belly (24) (→photos 09 and 10) Do not break yarn, continue with the next page.

The last round is crocheted around the outside of the legs and the belly (→photo 11). Do not crochet into the 12sc which joined the legs in the previous round (the stitches crocheted through the legs and the belly).
r.6: 9sc in the remaining stitches of the leg #1 (→photo 12), 3sc around the belly (→photo 13), 9sc in the remaining stitches of the leg #2, 3sc around the belly, 9sc in the remaining stitches of the leg #3, 3sc around the belly, 9sc in the remaining stitches of the leg #4, 3sc around the belly (48)
Fasten off, leaving a long tail for sewing (→photo 14).

Sew the carapace to the legs using the back loops of round 16 of the carapace and the stitches of round 6 of the belly (→photo 15), stuff firmly before finish the sewing. (→photo 16)

HEAD
Use red yarn:
r.1: 6sc in a magic ring (6)
r.2: 6inc (12)
r.3: [1sc, 1inc] x6 (18)
r.4: 17sc, 1slst, 3ch, start in the 2nd stitch from hook, 2slst; 1slst in the stitch at the base of the chain, 3ch, start in the 2nd stitch from hook, 2slst, 1slst in the stitch at the base of the chain.
Break yarn and fasten off invisibly (→photo 17).
Continue using green yarn:
r.5: Join drawing green yarn through the back loop of the stitch with the knot of the bandana (→photos 18 and 19), 1ch, 1sc in the same back loop, 1sc in the back loop of the fake stitch created by the invisible fastener (→photo 20), continue crocheting in round 4 through flo, 16sc (18)

Continue crocheting in a spiral.
r.6: [5sc, 1inc] x3 (21)
r.7-8 (2r.): 21sc (21)
Put a pin in the middle of the head between rounds 6 and 7 (→photo 21). On each side, count 2 stitches then insert and fix the eyes in the 3rd stitch (→photo 22).
r.9: 6sc, 5dec, 5sc (16)
r.10: 4sc, 4dec, 4sc (12)
Stuff the head firmly.
r.11-14 (4r.): 12sc (12)
r.15: 5sc, 3dec, 1sc (9)
r.16-18 (3r.): 9sc (9)
Stuff the top of the neck firmly and the bottom softly.
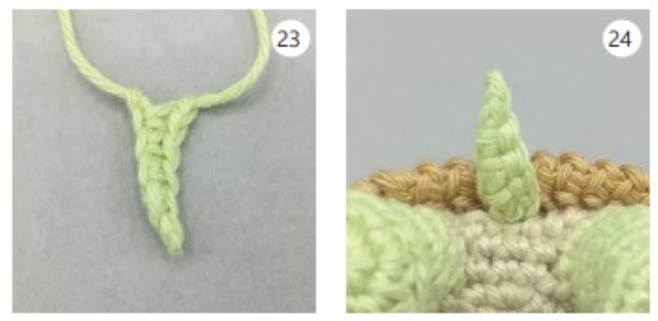
r.19: 3sc, 3dec (6) (→photo 23)

Fasten off, leaving a long tail for sewing, then close the remaining stitches through front loops.
Pin the head on the shell, it must be centered between the two front legs and the bottom of the neck must fall between the caramel and the beige rounds. Sew following the dotted line (→photo 24), only sew on the back of the neck, so that these stitches are not seen on the outside.
TAIL
Use green yarn to make a foundation chain of 6ch:
r.1: Start in the 2nd stitch from hook, 1slst 4sc (5) (→photo 23)
Fasten off, leaving a long tail for sewing.
Sew the tail to the shell, it must be centered between the two back legs and it must fall between the caramel and the beige rounds (→photo 24).
To finish
→ Cut two small circles of pink felt, approximately 7 mm in diameter. Glue them underneath the eyes (→photo 25).

→ You can cut out and attach the number sign onto your turtle’s shell, or create a custom bib for him!
More Amigurumi Turtle Ideas: